Love it or hate it, digital content is rapidly taking over in a world where we can create and share just about anything on the fly. It’s not all bad — when used well, it can become a tool to promote services and products that aid others or share a message that inspires positive change.
While you may have the best editing apps out there or even an Instagram Stories maker, there is no getting around poorly shot videos and photos, so we’re spilling our secrets to elevating your social media game with a few clever mobile camera tricks.
The ‘holiday goals’ photo
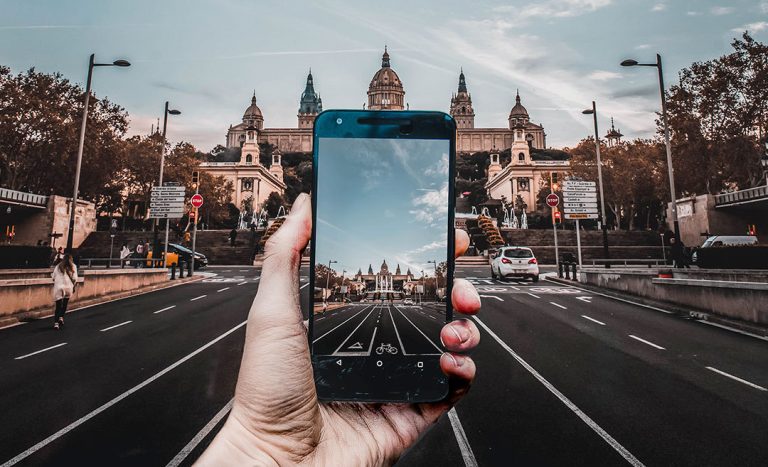
Lens compression is a phenomenon in which the background appears to be closer to a subject and larger than it actually is. To achieve this, compose your image, and once you’ve picked a scene you like, slowly step away from your subject while zooming in on your phone. This will distort the image, making the background appear larger.
For the how-to, click here.
The portrait shot
Take a backlit photo just before sundown for an elevated selfie of your travels. It gives your image more character and gives your viewers all those warm, vacation feels. To do this, have your subjects stand with their backs against the sun, allowing a little light to peek through from behind.
Reduce the image brightness just so the sun isn’t completely blown out, but not too much that you end up with a harsh silhouette. Click the photo and then edit it in the post. Bring up the brightness of the image a little.
Next, reduce the highlights and bring back some of the shadows. Enhance the contrast and vibrance of the image slightly. Finally, reduce the image clarity or sharpness a tad bit to soften the image. Voilà!
For the how-to, click here.
The seamless transition
Seamless transition videos take your travel content to the next level. It might seem complicated, but learning one simple transition gives you endless opportunities to get creative. To start, record your subject walking towards a transition point — this could be a door or a wall. Follow the subject until you hit the transition point you want in your video.
Keep the shot still for a few seconds after your subject is out of the frame before moving on to the next. Start recording the side of a door or wall for your second shot. Hold the shot still until your subject walks into frame and follow the subject before you end the recording.
Bring both your footage into a video editing app and place them both on your timeline in order. Clip a portion of the first video’s ending and the second video’s beginning. Add a transition effect between both videos (such as cross dissolve, zoom in/out, fade to black/white). Once you’ve found a transition that works, export the video, and upload it to your account.
For the how-to, click here.
The touristy shot
Long exposure involves using a slow shutter speed to capture an unmoving subject while blurring, smearing, or obscuring moving elements such as cars or people walking in the background. This is an incredible hack when attempting to take a photo in front of an iconic building or landscape that draws crowds.
There is an in-built long exposure feature on iOS devices. If you are using an Android device, use a third-party app like Lightroom. Set your shutter speed to 1/8 and keep your ISO low at 100 to 200 so your images are not grainy. Have your subject stand still and take a few shots as the crowds move around them.
Tip: For better results, set your phone on a tripod.
For the how-to, click here.
The day-in-a-life reel
Adding moving shots to your videos gives the subject and scene a more cinematic effect and makes your footage look far more professional. Set up the phone on a gimbal to stabilise your shots.
Pan the camera around your subject, moving slowly before turning the camera to the view to give the audience a glimpse of your day. If you want to capture some travel OOTDs in the city, have a friend move the camera around you as you walk and live out your Carrie Bradshaw dreams.
For the how-to, click here.
The panoramic shot
Remember when we all drowned our socials with long strips of panoramic footage that were only semi-decent? There’s a better way to use this feature on your phone. Tilt your phone sideways, turning the panoramic feature into a wide-angle lens for some dynamic shots. This is great for capturing tall trees or buildings in your shot.
Tip: To prevent over distortion, step further away from your subject.
For the how-to, click here.
The blue hour
We love a good golden hour picture, but have you tried capturing images during the blue hour? The blue hour is the twilight period that happens approximately 30 minutes before the sun rises and 30 minutes after the sun sets.
The soft rays from the sun at the horizon illuminate the sky in a warm blue tone that makes for muted, romantic, and almost mysterious pictures. To capture the blue hour on your phone, turn down the image’s brightness, so your subject is slightly underexposed.
Keep the shadows soft and highlights low. Allow the yellows and blues of the sky to tint your subject, giving it a dreamy effect.
For the how-to, click here.


